Golden Chicken Pot Pie
Ingredients
Creamy chicken filling
- 4 cups cooked chicken, cut into bite-size pieces (about 600 g)
- 6 tablespoons unsalted butter (85 g), plus a little for the dish
- 1 medium onion, finely diced (about 150 g)
- 1½ cups small diced carrots (about 200 g)
- ½ cup all-purpose flour (60 g)
- 3 cups low-sodium chicken broth (720 ml), plus a little if needed
- 1 cup whole milk (240 ml)
- 1 cup frozen peas (about 150 g)
- ¾ teaspoon fine salt, divided, then adjust to taste
- ½ teaspoon ground black pepper
Single pastry top
- 2 cups all-purpose flour (250 g), plus a little for rolling
- ½ teaspoon fine salt
- 12 tablespoons cold unsalted butter, cubed (170 g)
- 5–7 tablespoons ice water (75–105 ml), as needed
Egg wash
- 1 large egg
- 1 tablespoon water
The full recipe, step by step
There is something inviting about a golden chicken pot pie arriving at the table: a flaky crust, a creamy filling, and enough tender chicken to make every spoonful feel like dinner. This version brings that combination together in one family-size baking dish. Small carrots and green peas add color, while onion and a simple homemade sauce give the filling its savory flavor. The pastry turns golden above it, ready to break under a serving spoon and reveal the chicken underneath.
This recipe makes eight generous servings in a 9-by-13-inch baking dish and uses a single pastry crust on top. There is no bottom crust to roll, blind-bake, or worry about becoming soggy. The filling is fully cooked before assembly, so the oven finishes the pastry and heats everything together. Expect a loose, creamy scoop with a piece of golden crust resting above it, rather than a firm wedge that cuts like a dessert pie. That is the intended texture.
Read the ingredient lists before starting and set out a large saucepan or deep skillet, a whisk, a rolling pin, and your baking dish. Allow about 35 minutes of active preparation, 30 minutes of dough chilling that can overlap with preparing the filling, 35 to 45 minutes of baking, and 15 minutes of resting. Depending on how quickly you work, the whole process takes roughly 85 to 100 minutes. Cooked chicken makes this manageable without adding a separate chicken-cooking step.
Begin with four cups of cooked, boneless chicken, approximately 600 grams. Leftover roast chicken or plain rotisserie chicken works well; remove skin, bones, and cartilage before measuring. Cut the meat into irregular bite-size pieces, leaving a few naturally shredded edges. Large recognizable pieces give the finished serving more substance than finely minced chicken. Keep prepared chicken refrigerated until needed. If cooking chicken specifically for this recipe, cook it fully first, then cut and measure it before making the filling.
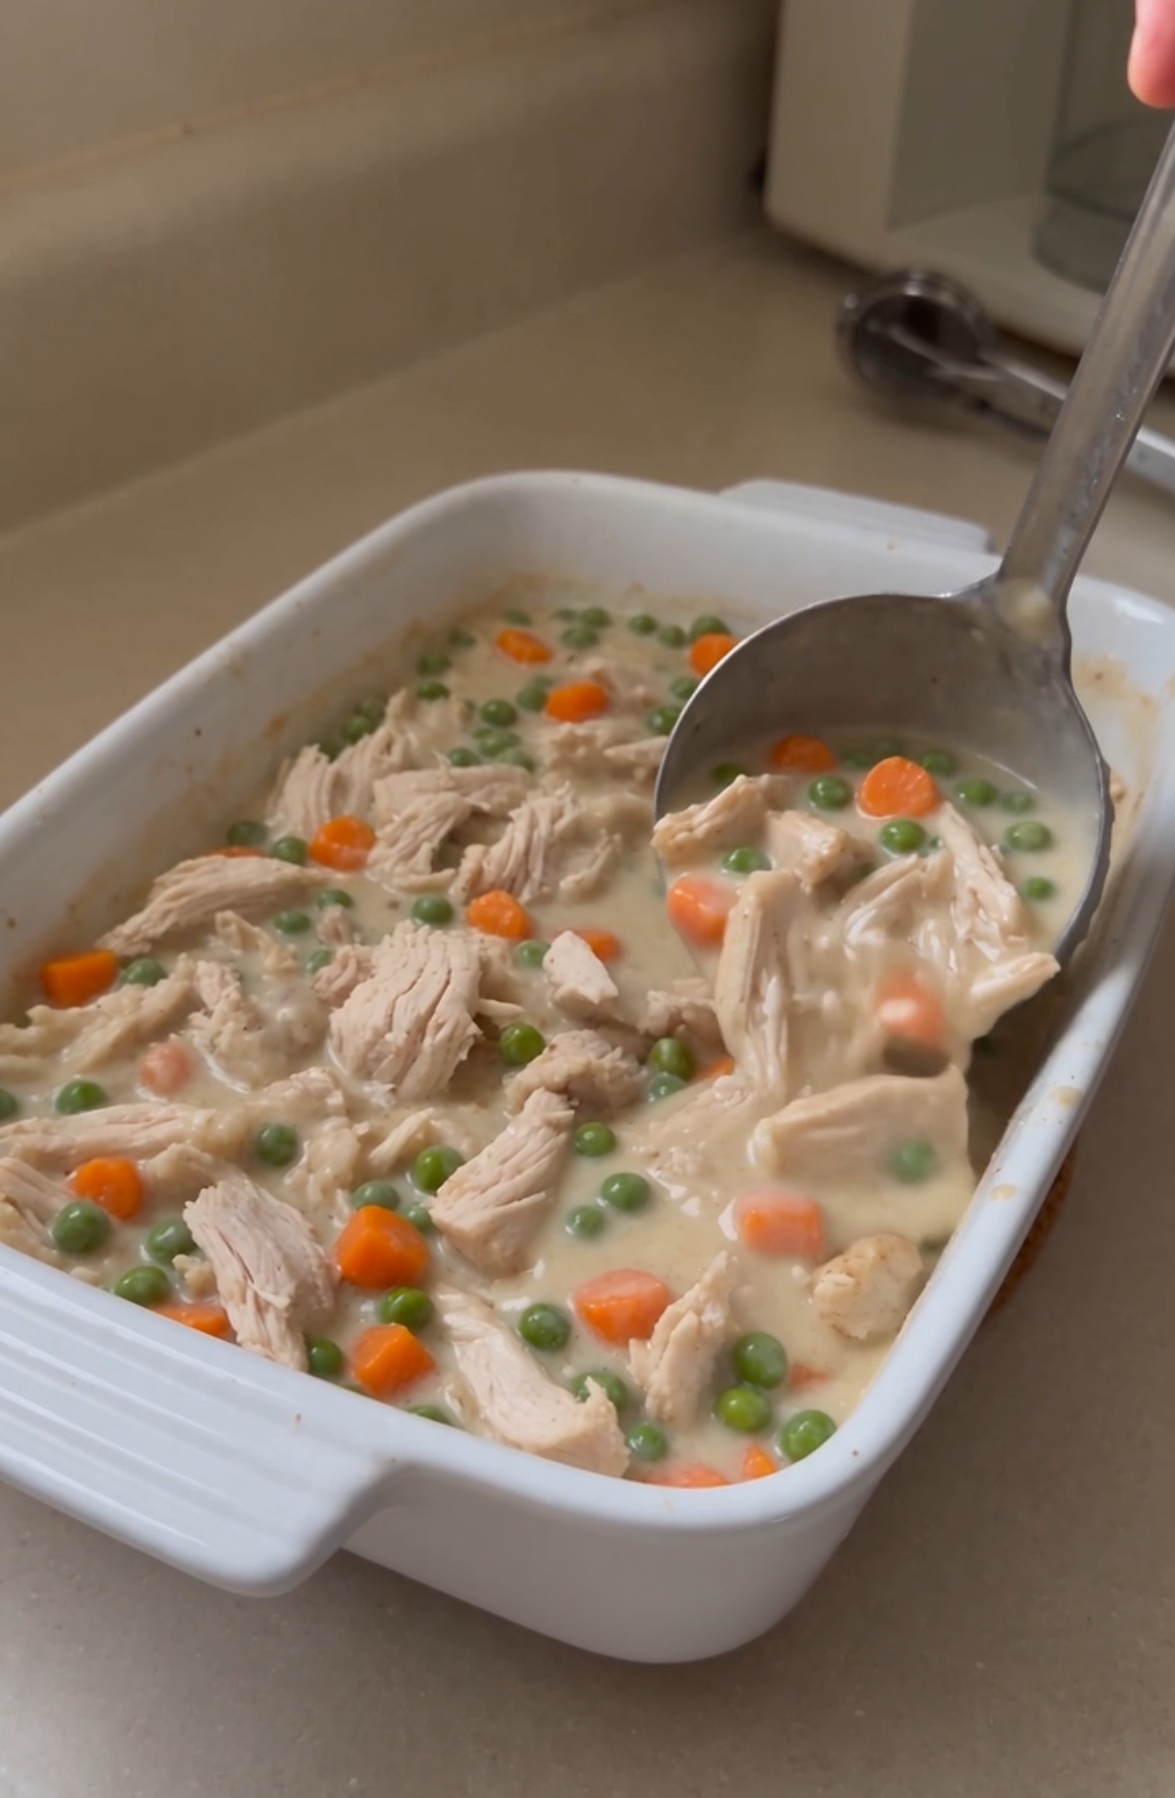
Dice the onion finely and cut the carrots into small pieces, approximately one-quarter inch across. Consistent carrot size helps them soften evenly during the saucepan stage. Measure the frozen peas and keep them ready to add near the end; they do not need a long separate cooking time. This vegetable combination keeps the finished filling close to the simple, colorful pot pie shown in the video. Avoid adding watery vegetables without adjusting the sauce, because extra moisture can make the filling loose.
For the pastry, stir two cups of all-purpose flour with one-half teaspoon of salt in a bowl. Add twelve tablespoons of cold unsalted butter, cut into small cubes. Work the butter into the flour with a pastry cutter or fingertips until you have coarse crumbs mixed with some pea-size butter pieces. Do not rub every piece completely smooth. Those small cold pieces help create a flaky texture. Work efficiently so the butter remains cool instead of becoming greasy or melting into the flour.
Sprinkle five tablespoons of ice water over the flour mixture and gently toss with a fork. Add more water one tablespoon at a time, only until the dough holds together when pressed; most batches need five to seven tablespoons in total. Gather it into a rough rectangular block without kneading it like bread dough. Wrap and refrigerate for at least 30 minutes. A little unevenness is fine. Too much handling or extra water can produce a tougher crust rather than a delicate, flaky top.
While the dough chills, prepare the filling. Set a rack in the middle of the oven and preheat to 400°F, approximately 205°C. Lightly butter a room-temperature 9-by-13-inch oven-safe baking dish and place a rimmed baking sheet nearby to catch any filling that bubbles over. Choose a dish rated for this oven temperature. Measure the broth, milk, flour, and seasonings before cooking, because the sauce comes together more smoothly when everything is within reach and the whisk is ready.
Melt six tablespoons of unsalted butter in a large saucepan or deep skillet over medium heat. Add the diced onion and carrots with a small pinch of the measured salt. Cook for eight to ten minutes, stirring occasionally, until the onion is soft and the carrots are beginning to soften. Lower the heat if the onion starts browning strongly. You want a gentle savory base, not dark fried vegetables. The carrots will continue cooking in the sauce, but they should not still be hard.
Sprinkle one-half cup of all-purpose flour over the softened vegetables and stir thoroughly so no dry pockets remain. Cook for about two minutes over medium-low heat, stirring constantly. The mixture will look thick and slightly pasty as the flour combines with the butter. That is normal: you are making the base that will thicken the broth and milk. Keep it pale rather than letting it turn dark brown. Scrape the bottom and corners of the pan so flour does not stick and scorch.
Add the three cups of low-sodium chicken broth gradually while whisking. Start with a small splash, smooth the thick mixture, then continue in several additions. Once the broth is incorporated, whisk in one cup of whole milk. Add the remaining measured salt and one-half teaspoon of black pepper, remembering that cooked chicken and broth can already contain salt. This gradual method helps prevent flour lumps. Stir along the bottom as well as through the center, where a whisk can otherwise miss thickened sauce.
Bring the sauce to a gentle simmer, then reduce the heat and cook for six to eight minutes, stirring frequently. It should become creamy enough to coat a spoon while still moving when stirred. Check a carrot piece; if it remains firm, simmer for a few minutes longer before proceeding. If the sauce becomes very stiff, loosen it with broth one tablespoon at a time. If it is thin, give it more simmering time. The filling should be thick and spoonable rather than soupy.
Fold in the prepared chicken and one cup of frozen peas. Simmer gently for two to three minutes, stirring carefully to distribute the meat without breaking every piece into tiny shreds. Taste the sauce and adjust the salt only if necessary. Every spoonful should include chicken, a little carrot or pea, and enough sauce to bring them together. Remove the pan from the heat once everything is combined. There is no need to boil the chicken vigorously or cook the peas until they lose their color.
Spoon the filling into the prepared baking dish and spread it into an even layer. Leave at least one-half inch of space below the rim so the filling has room to bubble during baking. If your dish is unusually shallow, reserve excess filling rather than overfilling it. Let the filling stand for about ten minutes while you roll the dough. This short pause reduces the heat reaching the butter in the pastry. Do not refrigerate a very hot ceramic dish or expose it to sudden temperature changes.
Lightly flour a clean work surface and roll the chilled dough into a rectangle approximately 11 by 15 inches, about one-eighth inch thick. Start from the center and turn the dough occasionally so it does not stick. Use only enough extra flour to keep it manageable; adding too much can dry it out. If the dough becomes soft and sticky, place it back in the refrigerator briefly. If an edge cracks, press it together gently. A homemade crust does not need perfectly straight corners to bake beautifully.
Support the pastry with the rolling pin and lay it gently across the filling without stretching it tight. Trim large overhangs, then tuck the edges just inside the dish and press lightly to secure them. Cut three short vent slits in the center. Beat one egg with one tablespoon of water and brush a thin layer over the top; you may not need all of it. Keep egg wash from pooling in the vents. The slits release steam, while the wash helps the pastry develop its golden finish.
Place the dish on the rimmed baking sheet and bake on the middle rack for 35 to 45 minutes. Start checking at 30 minutes because ovens and pastry thickness vary. Look for a well-browned golden top and filling bubbling through the vents or around an edge. Check that the center of the filling reaches 165°F with a food thermometer. If the pastry browns before the center is hot, tent loosely with foil and continue baking. Color alone is not a substitute for checking the filling temperature.
Move the finished pot pie to a heatproof surface and let it rest for about 15 minutes before serving. This gives the sauce time to settle and makes the portion easier to lift. Use a broad serving spoon to break a small section of the top crust, slide beneath the filling, and lift chicken and vegetables with a piece of pastry above them. Spoon onto a plate and keep the opened side visible. A simple green salad makes a pleasant side without competing with the rich filling.
If the first serving spreads a little, remember that this is a creamy top-crust casserole, not a tightly set pie slice. For the best texture, avoid an overly thin sauce, excessive filling, and serving immediately from the oven. A pale crust usually needs more baking time; a dark edge can be protected with foil. For advance preparation, make the filling and dough separately, refrigerate them promptly, then assemble when ready. A cold filling needs longer to heat, so check the center rather than relying on the original baking time.
Refrigerate leftovers in shallow covered containers within two hours of cooking, or within one hour if the surrounding temperature is above 90°F. Keep refrigerated leftovers for three to four days. Reheat the portion you plan to eat until its center reaches 165°F. An oven-safe covered dish at 350°F can help warm the filling, with the cover removed near the end to refresh the pastry; the time depends on portion size and starting temperature. Follow the USDA guidance for storage and reheating, and enjoy the remaining servings while their quality is best.