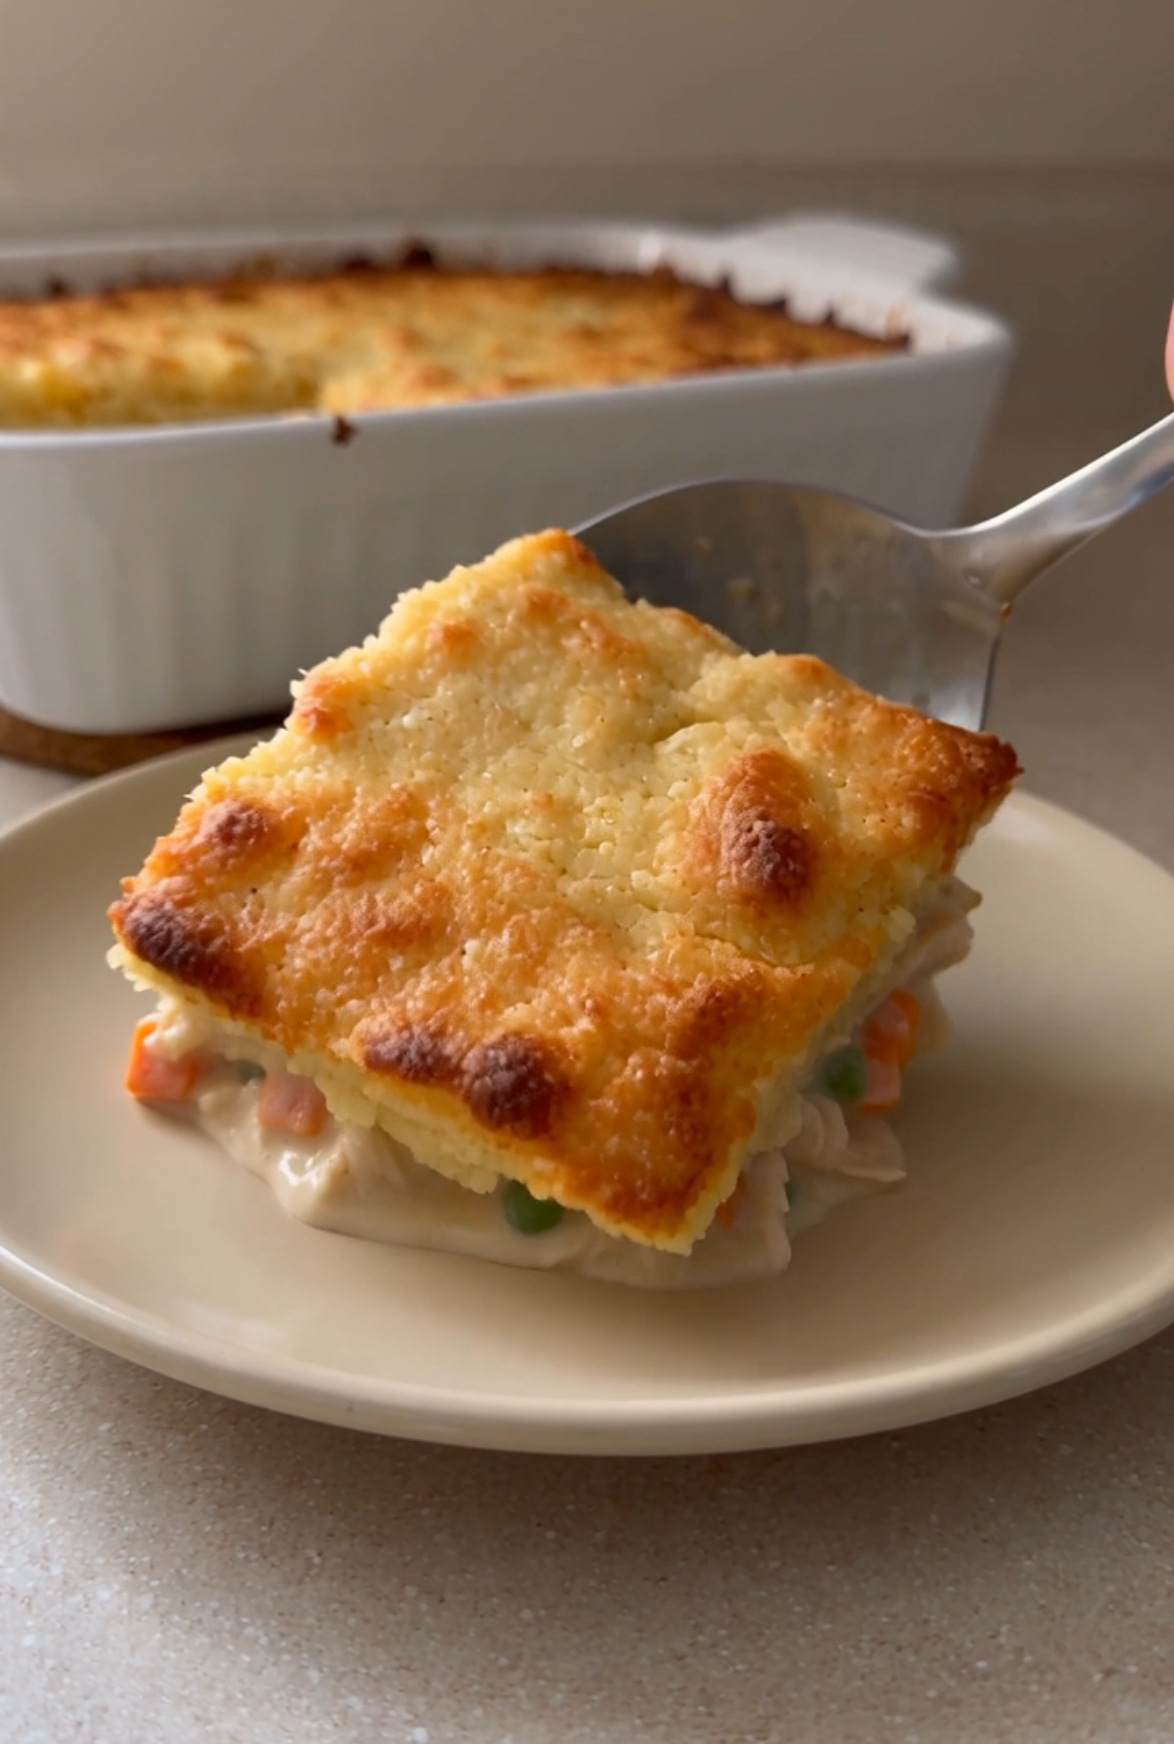
Chicken & Cheddar Biscuit Cobbler
Ingredients
Butter, chicken, and vegetables
- ½ cup unsalted butter, melted (8 tablespoons / 113 g)
- 3 cups fully cooked shredded chicken (about 450 g)
- 1 bag frozen peas and diced carrots (12 oz / 340 g)
Creamy broth layer
- 1 can condensed cream-of-chicken soup (10.5 oz / 298 g), undiluted
- 2 cups low-sodium chicken broth (480 ml)
Cheddar biscuit batter
- 2 level cups original all-purpose biscuit baking mix, such as original Bisquick (approximately 240 g; check the package equivalent)
- 2 cups whole milk (480 ml)
- 1 cup shredded sharp cheddar (113 g)
- ¼ teaspoon garlic powder
- ¼ teaspoon ground black pepper
The full recipe, step by step
Chicken and cheddar biscuit cobbler combines the comforting flavors of a chicken dinner with a golden, uneven biscuit topping. Beneath the surface, shredded chicken, peas, and carrots sit in a creamy sauce; above them, cheddar gives the biscuit layer a savory finish. This family-size version is assembled in one baking dish without stirring the layers together. It is designed to be served by the spoonful, with both topping and filling in each portion, rather than cut into firm slices like a pie.
The unusual part is the order of assembly. Melted butter goes into the dish first, followed by cooked chicken, vegetables, a separately mixed cheddar biscuit batter, and finally a smooth mixture of chicken broth and condensed soup. Before baking, the top can look much wetter than a conventional casserole. That does not mean the order is wrong. Keep the layers undisturbed and allow the oven to do the work. The finished texture should be a soft biscuit cobbler over creamy filling, not a dry bread loaf.
Start with three cups of fully cooked shredded chicken, approximately 450 grams. Plain rotisserie chicken or leftover roast chicken is convenient; remove skin, bones, and cartilage before measuring. Shred the meat into manageable strands while leaving some substantial pieces for a satisfying serving. Very finely minced chicken can disappear into the sauce. Keep the prepared meat refrigerated until assembly. This recipe does not cook raw chicken from the beginning, so do not replace the cooked meat with uncooked pieces and follow the same timing.
Use one 12-ounce bag of frozen peas and diced carrots, approximately 340 grams. Break apart any frozen clumps before scattering the vegetables, and remove loose ice crystals if the bag contains many. The peas and carrots can go into this recipe frozen. Their small size suits the creamy filling and helps them distribute between the chicken strands. Avoid changing to large raw carrot chunks without cooking them first. Keep this version simple so the finished dish matches the recognizable chicken, small vegetables, and cheddar topping shown in the video.
Set out a 9-by-13-inch baking dish with a capacity of about three quarts, two mixing bowls, a whisk, a spoon, and a rimmed baking sheet. One bowl is for the cheddar batter, and the other is for the soup mixture. Separate mixing is important even though assembled layers must not be stirred. Allow about 15 minutes for preparation, 55 to 70 minutes for baking, and 15 minutes for resting. Ovens, dish materials, and ingredient temperatures vary, so plan for approximately 85 to 100 minutes overall.
Preheat the oven to 350°F, approximately 175°C, with a rack in the middle position. Choose a room-temperature baking dish that is rated for oven use. Place the rimmed baking sheet nearby; the dish will sit on it during baking to catch drips. Do not begin with a shallow pan that leaves little space above the ingredients. The batter needs room to expand, and the filling may bubble around the edges. Read the full assembly order before pouring anything into the dish.
Melt one-half cup of unsalted butter, equal to eight tablespoons or 113 grams, and pour it into the baking dish. Tilt the dish gently so the butter forms an even base. Melting the butter separately is convenient and avoids handling a hot baking dish while adding the other ingredients. Do not add the butter to the biscuit bowl, and do not mix it into the chicken. For this layered method, the butter belongs underneath the filling, where it is already present before the first solid ingredient lands.
Scatter the shredded cooked chicken evenly over the melted butter. Work across the whole dish instead of placing all the meat in one central mound. A few overlapping strands are normal, but break apart large compressed handfuls. The goal is an even chicken layer that gives each serving a reasonable amount of meat. Do not press it hard into the base or stir it through the butter. Once the meat is distributed, leave it in place while preparing the next layer.
Sprinkle the frozen peas and carrots across the chicken in an even layer. Some chicken should remain visible between the vegetables; you do not need to hide it completely. Check the corners and edges for empty areas, then stop handling the assembled filling. Do not fold the vegetables into the meat or add a layer of extra liquid at this stage. Maintaining the simple sequence keeps the preparation easy to follow and prevents accidental mixing before the biscuit batter is poured over the surface.
In the first mixing bowl, combine two level cups of original all-purpose biscuit baking mix with one cup of shredded sharp cheddar. The baking mix should be a complete biscuit-style mix, such as original Bisquick, rather than plain flour, pancake-only mix, or a gluten-free blend substituted without adjustment. Product weights vary, so use the package’s cup equivalent when available; two cups are commonly around 240 grams. The cheddar is approximately 113 grams. Stir these dry ingredients briefly so the cheese is distributed before the milk goes in.
Pour two cups of whole milk, 480 milliliters, into the biscuit mixture. Add one-quarter teaspoon of garlic powder and one-quarter teaspoon of black pepper, then stir just until the dry mix is moistened. A few small lumps are acceptable. This recipe uses a loose batter, not the stiff dough used for individually shaped biscuits, so do not reduce the milk merely because it looks pourable. Avoid beating the mixture for several minutes. You want a smooth-enough pouring consistency while retaining visible cheddar shreds and a tender baked texture.
Pour the cheddar batter slowly over the chicken and vegetables, moving the bowl across the dish in a shallow sweep. Try to cover the area reasonably evenly without dragging a spoon through the filling. Small gaps near an edge are fine. If some batter remains in the bowl, scrape it onto an uncovered area without blending the layers below. Do not stir, swirl, or fold the casserole after this addition. The batter should remain above the chicken and vegetables rather than being deliberately mixed into them.
In the second bowl, whisk together one 10.5-ounce can of condensed cream-of-chicken soup, approximately 298 grams, and two cups of low-sodium chicken broth, 480 milliliters. Break up the thick soup until the mixture is smooth and pourable. Use the condensed soup directly from the can; do not prepare it with the extra water or milk listed for serving it as soup. The measured broth is the liquid added here. Lower-sodium ingredients help keep the dish balanced because the baking mix, cheese, soup, and cooked chicken may already contain salt.
Pour the smooth soup-and-broth mixture gently over the biscuit batter. Move the bowl across the dish so one spot does not receive the entire pour. The liquid will settle around and over parts of the batter, and the surface may look uneven or watery before baking. Leave it that way. Do not use a spoon to pull liquid down through the chicken or scrape batter up from underneath. This is the final assembled layer. No extra cheese, butter, or garnish needs to be added on top.
Once all the layers are in the dish, check that there is some clearance below the rim, then stop working the surface. The bowls may be mixed separately, but the casserole itself must remain unstirred. The batter expands and sets as the liquid heats around it, giving the finished dish its cobbler-style topping and creamy underside. Expect a homemade, irregular surface rather than a perfectly level crust. Stirring everything together changes that structure and can leave the biscuit mixture distributed through the filling instead of forming a recognizable upper layer.
Place the baking dish on the rimmed sheet and bake uncovered on the middle rack. Begin checking after 55 minutes, and expect approximately 55 to 70 minutes in many ovens. Frozen vegetables and very cold chicken can increase the time. Avoid opening the oven repeatedly during the early part of baking. The topping should develop golden raised areas, while the filling bubbles around the edges. Do not take the dish out simply because a few spots have browned if the center still looks like liquid batter.
Check the center carefully before declaring the cobbler finished. The biscuit layer should look set rather than glossy and raw, and the center of the filling should reach 165°F on a food thermometer. A moist underside beneath the topping is normal, but thick wet streaks of uncooked batter are not. If the surface is browning too quickly, cover it loosely with foil and continue baking. Do not seal the foil tightly around the dish. Give the center the time it needs without over-darkening the upper crust.
Transfer the finished cobbler to a heatproof surface and let it rest for about 15 minutes. The filling will continue settling during this pause, making it easier to serve a generous spoonful without a large puddle of thin sauce. Keep the dish upright and do not stir it after baking. A little creamy filling around the edges is expected. The top should remain uneven and golden, with a softer underside. Resting improves the serving texture; it does not turn the cobbler into a firm, sliceable block.
Serve with a broad spoon, pressing through one small section of the biscuit topping and sliding beneath the chicken filling. Lift a portion that includes golden cheddar topping, recognizable chicken strands, peas, carrots, and creamy sauce together. A little filling settling around the base on the plate is natural. A simple green salad makes a suitable side. For the best result, avoid adding more liquid next time merely because the assembled casserole looked wet; assess the fully baked and rested texture before changing the ingredient amounts.
Refrigerate leftovers in shallow covered containers within two hours of cooking, or within one hour if the surrounding temperature is above 90°F. Keep refrigerated leftovers for three to four days, and reheat only the amount you intend to serve until its center reaches 165°F. An oven-safe covered dish at 350°F can warm the filling, with the cover removed near the end to refresh the topping; the required time depends on portion size and starting temperature. See the USDA guidance for safe storage and reheating.