A simple guide to planting garlic, tending it through the seasons, and harvesting a new bulb from a single clove.
The headline sounds almost too good to be true: one clove, one whole bulb. But this is not a trick, a secret fertilizer, or a promise that a single clove will multiply into a basketful overnight. Garlic grows in a wonderfully simple way. A healthy individual clove, planted at the right time and cared for through the seasons, can develop into one new garlic bulb. That bulb is made of several cloves, giving a gardener a useful harvest from a small beginning. The real surprise is how little space the crop needs and how much patience it rewards.
The best time to start is usually fall in much of the United States, though local climate matters. Garlic needs a period of cool weather as it establishes roots and prepares for bulb development. University of Illinois Extension advises planting before the ground freezes, while regional recommendations vary with winter conditions. Gardeners in warmer regions may plant later than those in cold northern areas. Rather than copying a calendar date from another state, check your county extension service or a local nursery for the planting window in your area.
Start with a firm, healthy garlic bulb intended for planting. Seed garlic from a garden center or reputable supplier is a dependable choice because varieties are selected for growing. Grocery-store garlic may be treated to discourage sprouting, and its variety or growing history may be unknown. If you do try a grocery bulb, choose one that is firm and free of mold or soft spots, but understand that results can be less predictable. A locally adapted variety often performs better than a bulb chosen only because it looks large in a store.
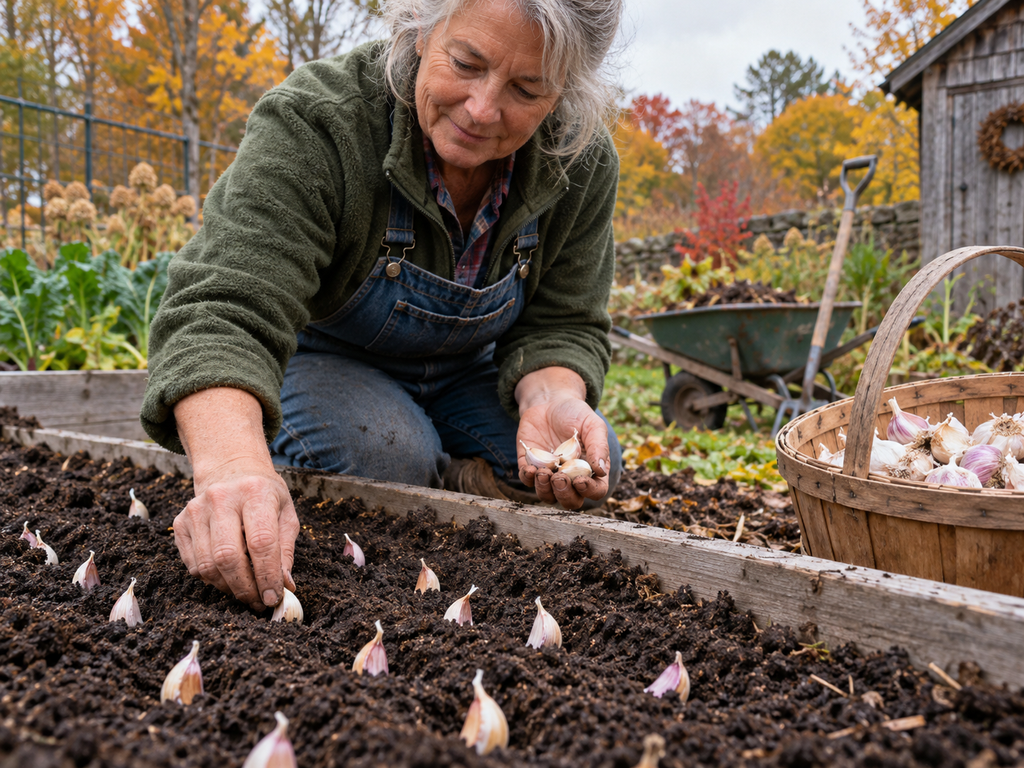
When you are ready to plant, gently separate the bulb into individual cloves. Keep the papery skin around each clove intact, and discard cloves that are bruised, shriveled, or diseased. The largest healthy cloves are usually the best candidates for growing full-sized bulbs. Do not peel them. Each clove contains the growing point and stored energy the plant needs to establish itself. The small cloves from the center may still grow, but they often produce smaller bulbs, so many gardeners save them for cooking instead.
Choose a place that receives full sun for most of the day and has soil that drains well. Garlic does not enjoy sitting in soggy ground, especially through winter. If water tends to collect in your bed, improve drainage or use a raised bed. Loosen the soil before planting and remove persistent weeds. A little finished compost can improve soil structure, but avoid adding fresh manure directly to the bed. Loose, fertile soil gives roots room to develop and makes harvest easier months later.
Plant each clove with its pointed end facing upward and its broad, root end down. A common guideline is to set cloves about two inches deep and several inches apart, with rows spaced far enough for weeding and airflow. Exact spacing recommendations differ by variety and region, so follow the instructions supplied with your seed garlic. The goal is to give each future bulb room to size up without crowding. Planting too shallow can expose cloves to winter heaving; planting excessively deep may delay emergence.
After placing a clove, cover it gently with soil and water the bed so the soil settles around it. Do not press the earth into a hard crust. In many climates, the clove will begin growing roots before winter and may send up a small shoot. That early green growth can be normal. The plant’s progress may slow dramatically when cold weather arrives, then resume as temperatures rise in spring. A quiet-looking bed in winter does not necessarily mean the cloves have failed.
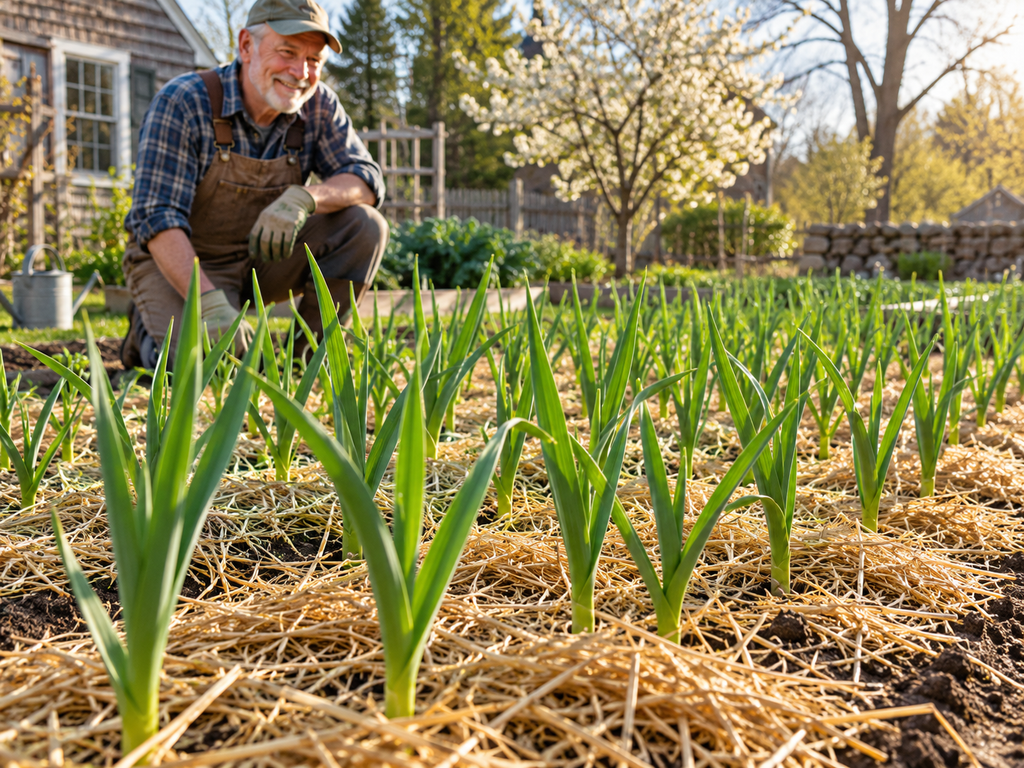
A light layer of loose straw or shredded leaves can help moderate soil temperature, conserve moisture, and reduce weeds. Mulch is especially useful where repeated freezing and thawing can push cloves toward the surface. Keep the layer loose enough that young shoots can emerge, and avoid piling wet, compacted material against the plants. In mild, rainy regions, excessive mulch can hold too much moisture. Observe the bed and adapt the cover to your conditions rather than treating one mulch depth as right for every garden.
As spring arrives, green leaves signal that the garlic is growing again. Keep the bed reasonably free of weeds, because weeds compete for light, water, and nutrients. Hand-pulling close to the plants is often safer than hoeing deeply, since garlic roots and developing bulbs sit beneath the soil. Water when rainfall is insufficient, aiming for steady moisture during active growth. The soil should not stay waterlogged. Near harvest, many growers reduce or stop watering as the leaves begin to dry, helping bulbs cure more successfully.
If you plant hardneck garlic, you may see a curled flower stalk called a scape in late spring or early summer. Many gardeners cut scapes when they are still tender and beginning to curl. This directs the plant’s energy toward bulb development and gives you an edible harvest with a mild garlic flavor. Softneck varieties generally do not make the same stiff scape. Removing scapes is not the magic that makes a bulb; it is one optional cultural practice commonly used with hardneck types.
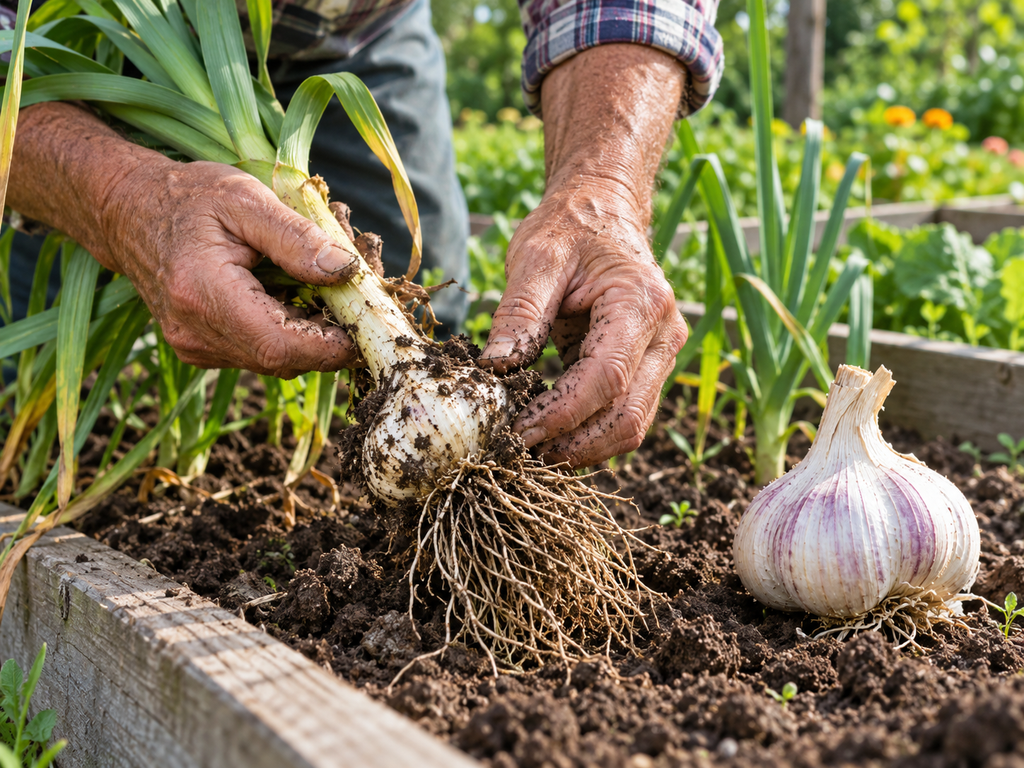
The leaves provide the most useful clue about harvest timing. Garlic is often ready when several lower leaves have browned while a number of upper leaves remain green. If you wait until every leaf has died back, the protective wrappers around the bulbs may have deteriorated, making storage harder. Timing varies with variety, weather, and planting date, so inspect a sample bulb rather than relying on a single date. Gently loosen the soil around one plant to check the bulb’s size and wrapper condition.
Harvest carefully with a garden fork or hand tool, loosening the soil beside the plant before lifting it. Pulling hard on the stem can break it and leave the bulb underground. Brush away loose soil, but do not wash bulbs intended for storage. Handle them gently, because bruises and cuts create entry points for decay. Freshly dug garlic can be used right away, but bulbs you hope to store need a curing period in a dry, shaded, well-ventilated place.
To cure garlic, spread or hang the plants where air can move around them, away from direct sun and rain. A garage, covered porch, or airy shed may work if the conditions are dry. Curing can take a few weeks, depending on humidity and airflow. The stems and outer wrappers should dry before you trim them for storage. Avoid sealing damp bulbs in plastic or placing them in a humid container. Good airflow and careful handling help preserve the harvest for later meals.
Once cured, store bulbs in a cool, dry place with ventilation. Save a few of the largest, healthiest bulbs for planting in the next season, and use the rest in the kitchen. When you are ready to plant again, separate those bulbs into cloves shortly before planting. That completes the cycle: one planted clove grows into one bulb, and that bulb can supply several cloves for future meals or a larger planting. The harvest can expand over years, but it does so through repeated planting, not instant multiplication.
Gardeners with limited space can still try garlic in a deep container, provided it has drainage holes and enough room for roots. Use a quality potting mix and place the container where it receives ample sun. Containers dry out faster than garden beds, so check moisture more often, while still avoiding waterlogged soil. In very cold areas, a container may freeze more deeply than the ground. Insulating it or moving it to a sheltered location can help, but keep the plants exposed to the seasonal cold they need.
Variety selection matters. Hardneck garlic is often favored in colder regions and produces a central stalk and scapes; softneck garlic is commonly found in grocery stores and can store well under suitable conditions. These are broad tendencies, not guarantees for every cultivar or climate. Ask local growers what succeeds nearby. Regional adaptation can affect bulb size, flavor, disease tolerance, and storage life. A variety recommended by gardeners in your county is often a safer first experiment than an exotic choice with no local track record.
Common disappointments usually have understandable causes. Small bulbs may result from planting tiny cloves, crowding, too much shade, poor soil, weeds, or a short growing season. Rot can follow persistently wet soil or damaged cloves. A bed that produces leaves but tiny bulbs may also need better timing or a variety suited to the local climate. Change one or two conditions at a time and keep simple notes. That makes it easier to learn which adjustment actually helped instead of guessing after every harvest.
For a first attempt, plant a modest row rather than transforming the whole garden. Mark the variety and planting date, note how many cloves you planted, and take a picture of the bed. In spring, record when shoots appear and whether scapes form. At harvest, compare bulb sizes and note which plants stored best. These small observations turn a catchy headline into a repeatable gardening lesson. The second season becomes easier because you are working from your own experience, not just someone else’s recipe.
The phrase “one clove, a whole bulb” is most useful when it sets a realistic expectation: one healthy clove can grow into one garlic bulb under suitable conditions. It is not a guaranteed yield, and a bulb’s size depends on variety, climate, soil, water, spacing, and care. Garden advice should make the process feel approachable without promising identical results for every yard. If your first bulbs are small, the experiment is still valuable; adjust the conditions and try again next season.
Garlic is a satisfying crop because the work is spread across the year. You plant when many summer crops are winding down, let the cloves establish through cooler weather, tend the green shoots in spring, and harvest when the leaves signal readiness. With a sunny spot, good drainage, and healthy planting cloves, a beginner can enjoy the simple pleasure of turning one clove into a homegrown bulb. Start with a few, follow local planting guidance, and let the garden teach you what works best where you live. You do not need expensive equipment or a large plot to begin. A small labeled bed, a handful of healthy cloves, and occasional observation are enough to make the first season worthwhile. Keep the headline in perspective, then enjoy the real reward: a flavorful crop you planted yourself and can use in the kitchen.